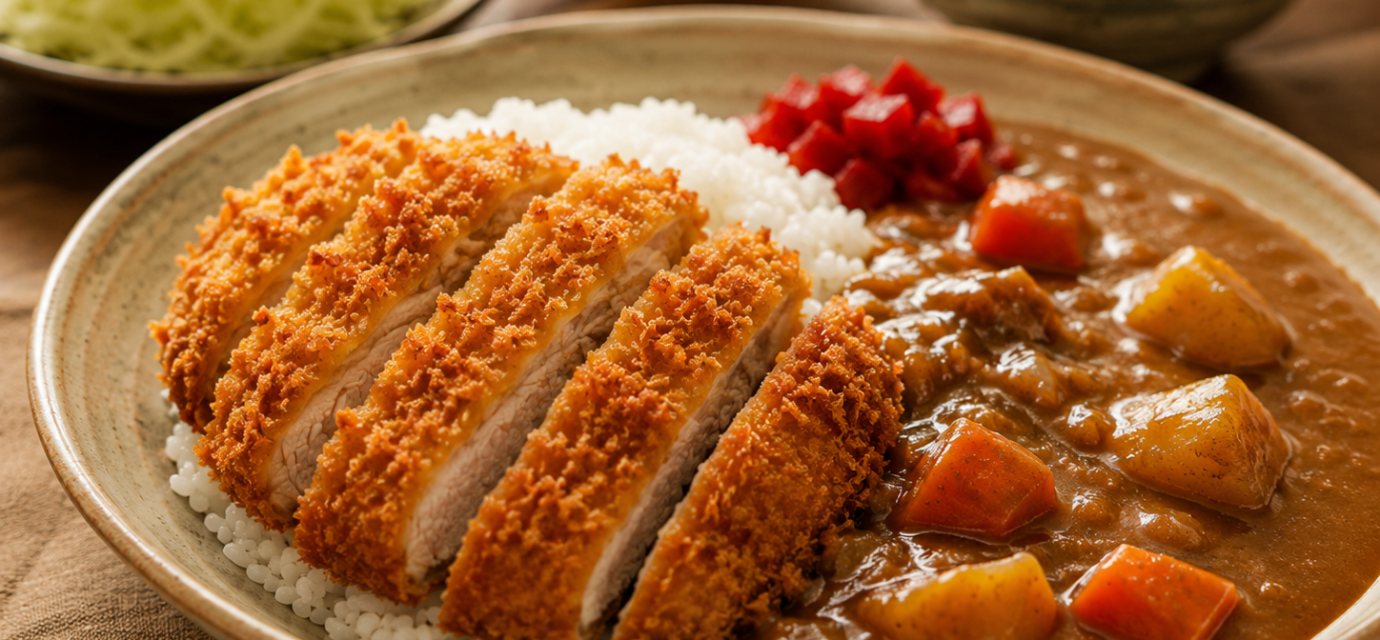
Japanese Chicken Katsu Curry: Crispy, Cozy, and Full of Comfort
There is something deeply comforting about Japanese chicken katsu curry. The plate arrives like a little promise: a mound of warm rice, a silky curry sauce filled with tender vegetables, and a golden chicken cutlet sliced into crisp strips that still crackle at the edges. It is hearty without being fussy, familiar without feeling plain, and flavorful in the kind of way that makes the whole kitchen smell like dinner is worth slowing down for.
This recipe is for the home cook who wants that satisfying restaurant-style plate without making the process feel overwhelming. The curry is thick, savory, lightly sweet, and gently spiced. The chicken is coated in panko breadcrumbs for a crust that fries up airy and crunchy. The rice brings everything together, catching the sauce and softening each bite. It is the kind of meal that feels right for a cozy weekend, a family dinner, or one of those evenings when comfort food needs to show up with a little extra personality.
Japanese chicken katsu curry also carries a story. It belongs to the world of yōshoku, Japanese-style Western-influenced cooking, where imported ideas were reshaped around Japanese tastes, ingredients, and rice-centered meals. Curry rice became one of Japan’s most beloved everyday dishes, and pairing it with katsu turns that comfort into something even more generous.
This Fly By Eats version keeps the technique approachable: pound the chicken evenly, build a balanced curry sauce, fry with steady heat, and serve everything while the cutlet is still crisp. The result is a warm, golden, deeply satisfying Japanese chicken katsu curry that tastes special but still feels like home.
Quick Recipe Snapshot
- Prep Time: 25 minutes
- Cook Time: 40 minutes
- Total Time: 1 hour 5 minutes
- Servings: 4
- Difficulty Level: Beginner to intermediate
- Best For: Cozy dinners, family meals, weekend cooking, Japanese-inspired comfort food, meal prep components
- Expected Result: Crispy panko chicken cutlets served with thick Japanese-style curry sauce, tender carrots and potatoes, steamed rice, and bright pickled garnish
Why You’ll Love This Recipe
- It delivers that beautiful contrast of crispy chicken, soft rice, and rich curry sauce.
- The curry sauce is homemade but still approachable for a regular home kitchen.
- Pounding the chicken helps it cook evenly and stay juicy.
- Panko breadcrumbs create a lighter, crunchier crust than fine breadcrumbs.
- The sauce can be made ahead, which makes dinner easier.
- The flavor is warm and savory with gentle sweetness from onion, carrot, and apple.
- It feels restaurant-worthy without requiring complicated equipment.
Cultural Background: A Comfort Dish with a Yōshoku Story
Japanese chicken katsu curry is often understood through two beloved food traditions: Japanese curry rice and katsu. Curry rice, or karē raisu, became popular in Japan after curry arrived through Western influence, especially British-style curry powder and thickened stew-like sauces. The Ministry of Agriculture, Forestry and Fisheries of Japan describes Yokosuka navy curry as one important regional story connected to Japanese curry’s growth, noting that curry rice became a popular home-style dish and that one theory traces its spread through the Japanese Navy during the Meiji era.
The dish also fits within yōshoku, a category of Japanese cooking shaped by Western influence but adapted to Japanese tastes. Japan National Tourism Organization describes yōshoku as Western food reinvented in the Japanese way, with dishes such as curry rice, omurice, and korokke becoming familiar parts of Japanese dining. Plenus Kome Academy also explains that Western-style dishes were adapted with Japanese ingredients, cooking methods, rice service, and local preferences.
Katsu, from katsuretsu, is connected to the idea of a cutlet. In Japan, panko-coated cutlets became part of this wider yōshoku tradition, often served with rice, shredded cabbage, and sauce. Katsu curry brings curry rice and a breaded cutlet together on one plate. Chicken katsu is a popular variation for home cooks because chicken breast or thigh is easy to find, cooks quickly, and pairs beautifully with the rich curry sauce.
Because food history is often layered, it is best to describe Japanese curry as a dish shaped by multiple influences: South Asian spice traditions, British-style curry powder and stews, Japanese rice culture, military and school-food history, and everyday home cooking. What matters most on the plate is how Japan made curry rice its own thick, comforting, flexible, and deeply loved.
Why This Recipe Works
This recipe works because each component has a job. The chicken is pounded to an even thickness so it cooks at the same pace from edge to center. That helps the coating brown before the meat dries out. The flour, egg, and panko breading system creates layers: flour helps the egg cling, egg helps the breadcrumbs stick, and panko gives the crust its signature airy crunch.
The curry sauce builds flavor in stages. Onions are cooked until softened and lightly golden, which gives the sauce a gentle sweetness. Garlic and ginger add warmth. Curry powder blooms in fat before the liquid goes in, helping the spices taste fuller and less dusty. A small amount of flour thickens the sauce into the comforting, gravy-like texture Japanese curry is known for.
The vegetables matter too. Carrots add sweetness, potatoes add body, and grated apple rounds out the curry without making it taste like dessert. Soy sauce and Worcestershire sauce bring savory depth, while ketchup or tomato paste adds gentle acidity. The final plate works because it balances crisp, soft, savory, sweet, and warm spices in every bite.
Ingredients
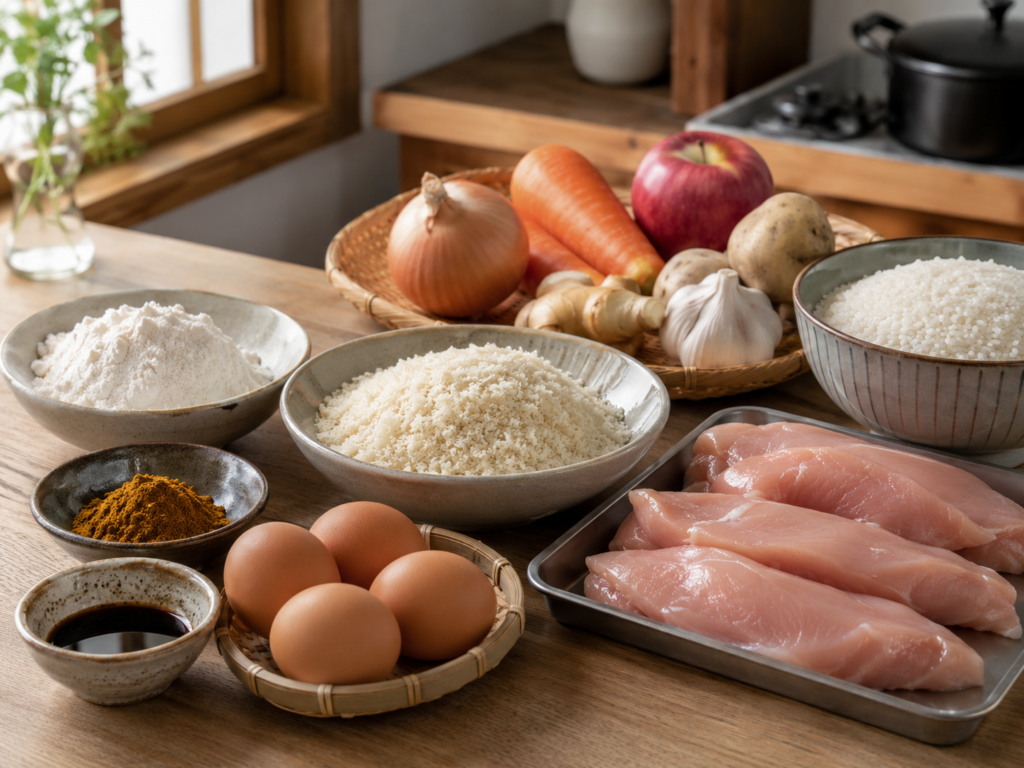
Ingredients for Japanese chicken katsu curry including chicken, panko, curry powder, vegetables, apple, and rice
For the Chicken Katsu
- 2 large boneless, skinless chicken breasts, about 1 1/2 pounds total
Chicken breast gives a lean, tender cutlet when pounded evenly. Chicken thighs may also be used for a juicier result. - 1 teaspoon kosher salt
Salt seasons the chicken before breading, so the flavor reaches the meat instead of staying only on the crust. - 1/2 teaspoon black pepper
Pepper adds mild warmth and balances the richness of the fried coating. - 1/2 cup all-purpose flour
Flour creates the first dry layer, helping the egg coating cling. - 2 large eggs
Eggs act as the binder between the flour and panko breadcrumbs. - 1 1/2 cups panko breadcrumbs
Panko creates the light, crisp, Japanese-style crust that makes katsu so satisfying. - 2 to 3 cups neutral oil, such as canola, vegetable, or rice bran oil
Neutral oil allows the chicken and curry flavors to shine. Use enough oil to come about 1/2 inch up the sides of the skillet.
For the Japanese-Style Curry Sauce
- 2 tablespoons neutral oil or unsalted butter
Fat helps soften the aromatics and bloom the curry powder. - 1 large yellow onion, thinly sliced
Onion gives sweetness and body to the curry sauce. - 2 garlic cloves, minced
Garlic adds savory depth and warmth. - 1 tablespoon fresh ginger, grated
Ginger brightens the curry and keeps the sauce from feeling heavy. - 2 tablespoons all-purpose flour
Flour thickens the curry into a smooth, spoonable sauce. - 2 tablespoons Japanese curry powder or mild curry powder
Curry powder provides the main spice profile. Japanese curry powder is ideal, but a mild curry powder can work. - 3 cups low-sodium chicken stock
Stock gives the curry body and savory flavor. Low-sodium stock allows better control over seasoning. - 2 medium carrots, peeled and cut into bite-size chunks
Carrots add sweetness, color, and tender texture. - 1 medium russet or Yukon gold potato, peeled and cut into bite-size chunks
Potato gives the curry heartiness and helps make the sauce feel comforting. - 1/2 small apple, peeled and finely grated
Apple adds subtle sweetness and roundness, a common home-style touch in Japanese curry. - 1 tablespoon soy sauce
Soy sauce adds umami and saltiness. - 1 tablespoon Worcestershire sauce
Worcestershire sauce adds tang, savoriness, and complexity. - 1 tablespoon ketchup or tomato paste
Ketchup gives mild sweetness and acidity. Tomato paste gives a deeper, less sweet flavor. - 1 teaspoon honey or brown sugar, optional
Use only if you prefer a slightly sweeter curry. - 1/2 teaspoon kosher salt, plus more to taste
Salt sharpens the sauce and brings the flavors together. - 1/4 teaspoon black pepper
Pepper adds a gentle finishing warmth.
For Serving
- 4 cups cooked Japanese short-grain rice or medium-grain rice
Short-grain rice has a slightly sticky texture that pairs beautifully with thick curry sauce. - Fukujinzuke, pickled ginger, or quick pickled cucumbers
Pickles add brightness and cut through the richness. - Thinly sliced scallions, optional
Scallions add fresh color and a mild onion note. - Shredded cabbage, optional
Cabbage is a classic partner for katsu and brings crunch and freshness.
Ingredient Notes and Smart Substitutions
Chicken breast or thigh: Chicken breast gives a clean, classic cutlet, but boneless chicken thighs are delicious if you prefer a juicier, richer bite. Thighs may need a little extra cooking time.
Panko breadcrumbs: Panko is the best choice for texture. Kikkoman describes panko as Japanese-style breadcrumbs made from shokupan and crushed into larger crumbs, which helps create crunch. Regular breadcrumbs can be used in a pinch, but the crust will be denser.
Curry powder: Japanese curry powder gives the most familiar flavor. Mild curry powder works too, especially when balanced with soy sauce, Worcestershire sauce, and grated apple.
Store-bought curry roux option: For a faster version, skip the flour, curry powder, ketchup, and some seasoning. Use Japanese curry roux cubes according to the package directions, then serve with fresh chicken katsu. Taste before adding extra salt because roux cubes can be salty.
Gluten-free option: Use gluten-free flour, gluten-free panko, gluten-free tamari, and a gluten-free Worcestershire sauce. Always check labels.
Dairy-free option: Use neutral oil instead of butter.
Vegetarian variation: Replace chicken katsu with crispy tofu katsu, eggplant katsu, or mushroom katsu. Use vegetable stock in the curry sauce.
Rice substitution: Japanese short-grain rice is ideal, but medium-grain rice works. Jasmine rice will taste good, but it gives a different texture.
Equipment You’ll Need
- Cutting board
- Sharp knife
- Meat mallet, rolling pin, or heavy skillet for pounding chicken
- Plastic wrap or parchment paper
- 3 shallow bowls for breading
- Large skillet or Dutch oven for curry
- Heavy skillet or sauté pan for frying
- Tongs
- Instant-read food thermometer
- Wire rack set over a baking sheet
- Paper towels
- Rice cooker or pot for rice
Step-by-Step Directions
1. Prepare the rice.
Cook the rice first so it is ready when the chicken comes out hot and crisp. If using a rice cooker, start it before making the curry. If cooking on the stovetop, rinse the rice until the water runs mostly clear, then cook according to the package directions. Keep warm.
2. Pound the chicken evenly.
Place the chicken breasts between sheets of plastic wrap or parchment paper. Pound to about 1/2-inch thickness. Even thickness matters because it helps the chicken cook quickly and safely without over-browning the crust.
3. Season the chicken.
Pat the chicken dry with paper towels. Season both sides with kosher salt and black pepper. Let it sit while you start the curry sauce. Do not rinse raw chicken; patting dry is enough and helps the breading stick.
4. Start the curry base.
Heat 2 tablespoons of oil or butter in a large saucepan over medium heat. Add the sliced onion and cook for 8-10 minutes, stirring often, until softened and lightly golden. This step builds sweetness and depth.
5. Add garlic, ginger, flour, and curry powder.
Stir in the garlic and ginger for about 30 seconds, just until fragrant. Sprinkle in the flour and curry powder. Stir constantly for 1-2 minutes. The mixture should look slightly pasty and smell warm and toasty. This helps remove the raw flour taste and wakes up the spices.
6. Add liquid slowly.
Pour in the chicken stock gradually while whisking or stirring to prevent lumps. Once the sauce is smooth, add the carrots, potato, grated apple, soy sauce, Worcestershire sauce, ketchup or tomato paste, optional honey or brown sugar, salt, and pepper.
7. Simmer until tender.
Bring the curry to a gentle boil, then reduce the heat to low. Simmer uncovered for 20-25 minutes, stirring occasionally, until the carrots and potatoes are tender and the sauce has thickened. If it becomes too thick, add a splash of stock or water. Taste and adjust with salt or a small extra splash of soy sauce.
8. Set up the breading station.
Place flour in one shallow bowl, beaten eggs in the second bowl, and panko breadcrumbs in the third. Keep one hand for dry ingredients and one hand for the egg, if possible. This keeps the coating cleaner and easier to manage.
9. Bread the chicken.
Dredge each piece of chicken in flour and shake off the excess. Dip into egg, letting extra egg drip off. Press firmly into panko on both sides, making sure the crumbs cling well. Place breaded chicken on a plate or rack for 5 minutes. This short rest helps the coating adhere.
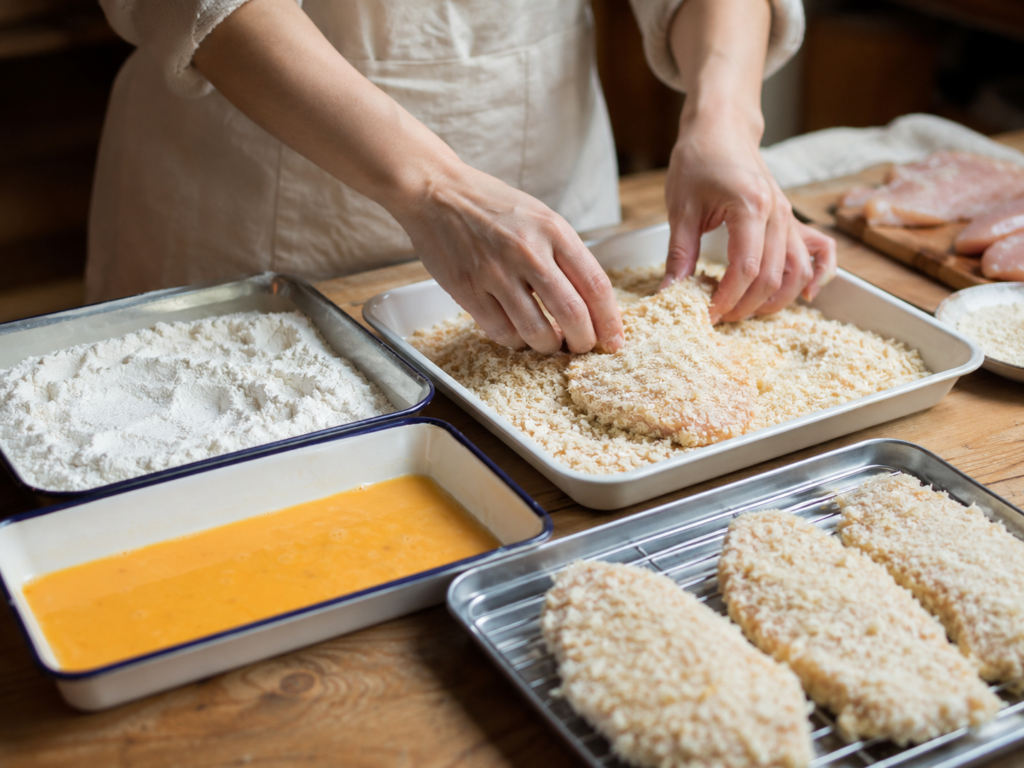
Chicken cutlets coated in panko breadcrumbs for homemade chicken katsu curry
10. Heat the oil.
Add neutral oil to a heavy skillet, about 1/2 inch deep. Heat the oil over medium to medium-high heat until it reaches about 340°F to 350°F. If you do not have a thermometer, drop in a few panko crumbs. They should sizzle immediately but not burn.
11. Fry the chicken katsu.
Carefully add the chicken, working in batches if needed, so the pan is not crowded. Fry for 3-5 minutes per side, depending on thickness, until deeply golden and crisp. Adjust the heat as needed so the crust browns steadily without burning.
12. Check doneness safely.
Transfer the chicken to a wire rack. Use an instant-read thermometer inserted into the thickest part of the chicken. Poultry should reach 165°F. If the crust is browned but the chicken is not fully cooked, place it in a 350°F oven for a few minutes until it reaches temperature.
13. Rest and slice.
Let the chicken rest for 3-5 minutes. This keeps the juices from running out immediately when sliced. Cut into strips with a sharp knife.
14. Assemble the plates.
Spoon warm rice onto each plate or shallow bowl. Ladle curry sauce alongside or partly over the rice. Place sliced chicken katsu on top of or beside the curry so some of the crust stays crisp. Add pickles, scallions, and shredded cabbage if using.
15. Serve right away.
Chicken katsu is best when freshly fried. Serve while the crust is crisp and the curry sauce is hot.
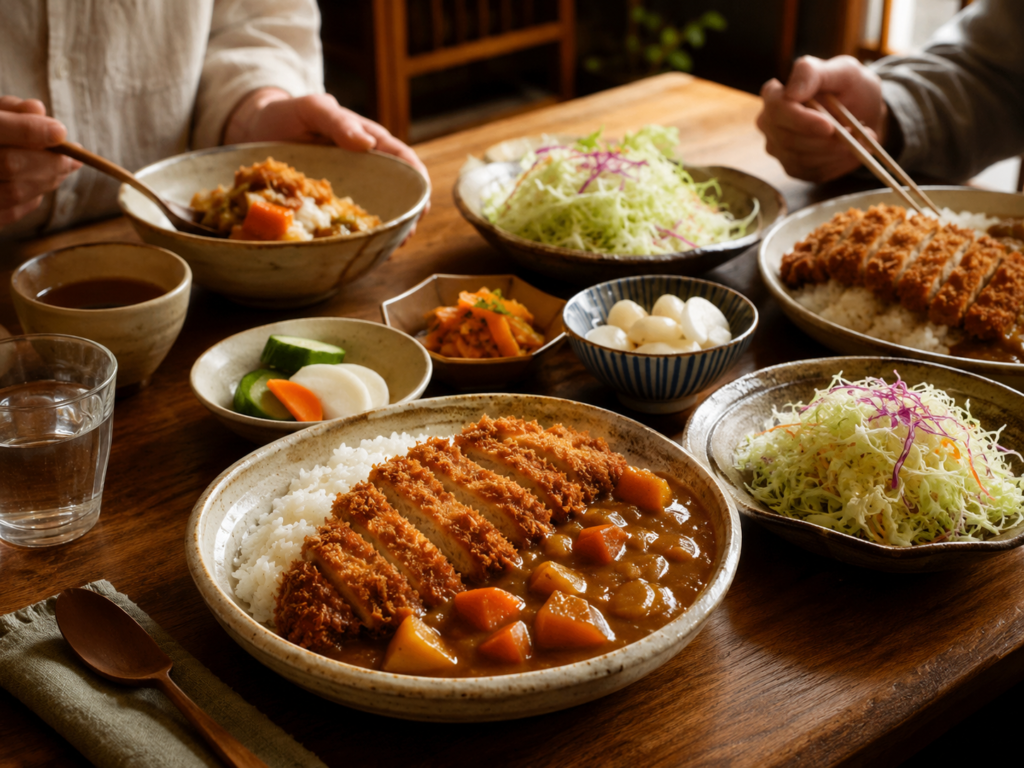
Cozy table setting with Japanese chicken katsu curry, cabbage salad, rice, and pickled vegetables
Pro Tips for Best Results
- Pound the chicken evenly so it cooks at the same speed from edge to center.
- Pat the chicken dry before breading; moisture can make the coating slide off.
- Press the panko onto the chicken firmly for a fuller crust.
- Let the breaded chicken rest for 5 minutes before frying to help the coating set.
- Keep the oil around 340°F to 350°F for crisp browning without greasy breading.
- Use a wire rack instead of stacking fried chicken on paper towels; a rack keeps the bottom crisp.
- Simmer the curry gently so the potatoes soften without breaking apart too much.
- Taste the curry at the end; soy sauce, curry powder, and stock vary in saltiness.
- Slice the katsu right before serving so the coating stays crisp.
- Keep the sauce and cutlets separate for leftovers to preserve texture.
Common Mistakes to Avoid
- Skipping the chicken thermometer: Color is not enough to confirm doneness. Use a food thermometer and cook poultry to 165°F.
- Crowding the pan: Too much chicken lowers the oil temperature and makes the breading greasy.
- Using high heat the whole time: The panko may burn before the chicken cooks through. Adjust as needed.
- Adding all the stock at once without stirring: This can make the curry lumpy. Add liquid gradually.
- Cutting potatoes too large: Oversized chunks take longer to cook and can throw off timing.
- Pouring curry over all the katsu too early: The sauce softens the crust. Serve the sauce beside or partly under the chicken if you want more crunch.
- Not seasoning in layers: A little salt on the chicken and a final taste of the curry make a big difference.
- Storing rice at room temperature for too long: Cool and refrigerate leftover rice promptly.
Flavor Variations
- Spicy Chicken Katsu Curry: Add 1/4 to 1/2 teaspoon cayenne or Japanese chili powder to the curry sauce.
- Extra-Savory Curry: Add a teaspoon of miso or a small splash of extra soy sauce at the end.
- Sweeter Home-Style Curry: Add a little more grated apple or a teaspoon of honey.
- Vegetable-Forward Curry: Add peas, mushrooms, zucchini, or bell pepper near the end of simmering.
- Baked Chicken Katsu: Toast the panko lightly in a dry skillet with a small amount of oil, bread the chicken, then bake at 425°F until crisp and the chicken reaches 165°F.
- Chicken Thigh Katsu Curry: Use boneless, skinless thighs for a juicier cutlet with deeper flavor.
- Tofu Katsu Curry: Press firm tofu, slice into slabs, season, bread, and pan-fry until crisp.
Serving Suggestions
Japanese chicken katsu curry is filling on its own, but small sides make the plate feel complete. Serve it with shredded cabbage, cucumber salad, steamed edamame, miso soup, or quick pickled vegetables. Fukujinzuke is a classic curry rice garnish, but pickled ginger or lightly pickled cucumbers can bring the same bright contrast.
For drinks, try iced green tea, roasted barley tea, sparkling water with lemon, or a light lager-style beer for adults. For a cozy dinner table, serve the curry in shallow bowls with the chicken sliced neatly across the top and the pickles tucked to the side. A sprinkle of scallions or sesame seeds adds a simple finishing touch.
For a family-style meal, keep the rice, curry, sliced katsu, cabbage, and pickles in separate serving dishes so everyone can build their own plate. This also helps keep the chicken crispy longer.
Storage, Freezing, and Reheating
Food safety matters with this recipe because it includes cooked poultry, rice, and sauce. FoodSafety.gov recommends cooking poultry to 165°F and reheating leftovers to 165°F. Leftovers should be refrigerated within 2 hours, or within 1 hour if the food is exposed to temperatures above 90°F. The FDA recommends keeping refrigerators at or below 40°F and freezers at 0°F.
Refrigerator: Store curry sauce, rice, and chicken katsu in separate airtight containers. Refrigerate within 2 hours. Use within 3-4 days.
Freezer: Freeze curry sauce for the best quality within 2-3 months. Chicken katsu can be frozen, though the crust will be best if reheated in an oven or air fryer. Rice can also be frozen in portions.
Reheating curry sauce: Reheat in a saucepan over medium-low heat until steaming hot, stirring often. Add a splash of water or stock if it thickens too much.
Reheating chicken katsu: Reheat in a 375°F oven or air fryer until hot and crisp. Check that reheated leftovers reach 165°F.
Reheating rice: Add a small splash of water, cover, and microwave until steaming hot. Stir and check that it heats evenly.
Avoid reheating chicken katsu in the microwave if crispness matters. It is safe when reheated properly, but the breading will soften.
Make-Ahead Tips
The curry sauce can be made 1-2 days ahead and refrigerated. In fact, the flavor often tastes deeper after resting overnight. Reheat gently before serving.
The chicken can be pounded and seasoned earlier in the day, then kept covered in the refrigerator until ready to be breaded. For the best texture, bread and fry the chicken close to serving time.
The vegetables can be peeled and chopped 1 day ahead. Store potatoes submerged in cold water in the refrigerator, then drain and pat dry before cooking.
Rice can be cooked ahead and refrigerated or frozen in portions. Reheat with a little moisture so it becomes soft and steamy again.
Frequently Asked Questions
Can I make Japanese chicken katsu curry with store-bought curry roux?
Yes. Store-bought Japanese curry roux is a common shortcut and works well for busy nights. Prepare the curry according to the package directions, then serve it with freshly fried chicken katsu.
What is the difference between chicken katsu curry and regular Japanese curry?
Regular Japanese curry is usually a curry sauce with vegetables and sometimes meat, served over rice. Chicken katsu curry adds a crispy panko-breaded chicken cutlet on top of or alongside the curry.
Can I use chicken thighs instead of chicken breasts?
Yes. Boneless, skinless chicken thighs work beautifully and tend to stay juicy. Pound them to an even thickness and cook until they reach 165°F.
Why is my chicken katsu not crispy?
The oil may have been too cool, the pan may have been crowded, or the chicken may have been placed directly on paper towels for too long. Fry in batches and rest the chicken on a wire rack.
Can I bake the chicken instead of frying it?
Yes. For better color, lightly toast the panko with a little oil before breading. Bake at 425°F until crisp, and the chicken reaches 165°F.
Is Japanese curry very spicy?
Japanese curry is usually mild to medium, warm, savory, and slightly sweet. You can make it spicier with cayenne, chili powder, or a hotter curry powder.
What rice is best for chicken katsu curry?
Japanese short-grain rice is ideal because it is slightly sticky and holds the sauce well. Medium-grain rice is a good substitute.
How do I keep the katsu crispy when serving?
Do not fully cover the cutlet with curry sauce too early. Place the curry beside the rice and lay the sliced katsu partly on top so some of the crust stays exposed.
Final Thoughts
Japanese chicken katsu curry is one of those dishes that feels generous from the first bite. It does not ask for perfection. It asks for a little patience, a warm pan, a steady hand with the breadcrumbs, and enough care to let each piece do what it does best. The rice brings comfort. The curry brings warmth. The chicken brings that golden crunch that makes the whole plate feel celebratory, even if it is just a regular evening at home.
What makes this recipe so special is the way it carries both story and practicality. It reflects a food tradition shaped by travel, adaptation, home cooking, and everyday appetite. It also fits beautifully into modern family kitchens because it is flexible. You can make the curry sauce from scratch or use a trusted roux. You can fry the cutlet or bake it. You can serve it with classic pickles or a simple cucumber salad. You can make the sauce ahead and fry the chicken fresh when everyone is ready to eat.
For Fly By Eats, this is the kind of recipe that belongs at the heart of the table: warm, flavorful, culturally curious, and approachable. It invites readers to cook with respect for where a dish comes from while still feeling confident enough to make it their own. That is the beauty of comfort food across cultures. It teaches, welcomes, and feeds at the same time.
So plate it with care, spoon the curry generously, keep a little crunch showing on the katsu, and let the meal do what good food always does: bring people closer to the table.
Quick Recipe Card
Recipe Name: Japanese Chicken Katsu Curry
Description: Crispy panko-breaded chicken cutlets served with thick Japanese-style curry sauce, tender vegetables, warm rice, and bright pickled garnish.
Prep Time: 25 minutes
Cook Time: 40 minutes
Total Time: 1 hour 5 minutes
Servings: 4
Ingredients
For the Chicken Katsu:
- 2 large boneless, skinless chicken breasts, about 1 1/2 pounds total
- 1 teaspoon kosher salt
- 1/2 teaspoon black pepper
- 1/2 cup all-purpose flour
- 2 large eggs, beaten
- 1 1/2 cups panko breadcrumbs
- 2-3 cups neutral oil, for frying
For the Curry Sauce:
- 2 tablespoons neutral oil or unsalted butter
- 1 large yellow onion, thinly sliced
- 2 garlic cloves, minced
- 1 tablespoon fresh ginger, grated
- 2 tablespoons all-purpose flour
- 2 tablespoons Japanese curry powder or mild curry powder
- 3 cups low-sodium chicken stock
- 2 medium carrots, peeled and cut into bite-size chunks
- 1 medium russet or Yukon gold potato, peeled and cut into bite-size chunks
- 1/2 small apple, peeled and finely grated
- 1 tablespoon soy sauce
- 1 tablespoon Worcestershire sauce
- 1 tablespoon ketchup or tomato paste
- 1 teaspoon honey or brown sugar, optional
- 1/2 teaspoon kosher salt, plus more to taste
- 1/4 teaspoon black pepper
For Serving:
- 4 cups cooked Japanese short-grain rice or medium-grain rice
- Fukujinzuke, pickled ginger, or quick pickled cucumbers
- Thinly sliced scallions, optional
- Shredded cabbage, optional
Instructions
- Cook the rice and keep it warm.
- Pound chicken breasts to about 1/2-inch thickness. Pat dry and season with salt and pepper.
- Heat oil or butter in a saucepan. Add onion and cook until softened and lightly golden, about 8-10 minutes.
- Stir in garlic and ginger for 30 seconds. Add flour and curry powder. Stir for 1-2 minutes.
- Slowly add chicken stock while stirring to prevent lumps.
- Add carrots, potatoes, grated apple, soy sauce, Worcestershire sauce, ketchup or tomato paste, optional honey, salt, and pepper.
- Simmer for 20-25 minutes, until vegetables are tender and the sauce is thickened. Adjust seasoning.
- Set up three bowls: flour, beaten eggs, and panko.
- Dredge chicken in flour, dip in egg, then press into panko.
- Heat oil in a skillet to about 340°F to 350°F.
- Fry chicken for 3-5 minutes per side, until golden and crisp.
- Check that the chicken reaches 165°F in the thickest part.
- Rest chicken for 3-5 minutes, then slice.
- Serve rice with curry sauce and sliced chicken katsu. Garnish with pickles, scallions, or cabbage.
Notes:
- Keep the curry and chicken separate until serving for the crispiest texture.
- Use chicken thighs if you prefer a juicier cutlet.
- For a shortcut, use Japanese curry roux and make the katsu fresh.
- Add cayenne or chili powder for a spicier curry.
Storage:
Store curry, rice, and chicken katsu separately in airtight containers. Refrigerate within 2 hours and use within 3 to 4 days. Reheat leftovers to 165°F. Freeze curry sauce for the best quality within 2 to 3 months.
Nutrition Disclaimer: Nutrition information, if provided, is an estimate and may vary based on ingredients and preparation methods.
References
- FoodSafety.gov. (2024, November 21). Cook to a safe minimum internal temperature. U.S. Department of Health & Human Services. https://www.foodsafety.gov/food-safety-charts/safe-minimum-internal-temperatures
- FoodSafety.gov. (2023, September 19). Cold food storage chart. U.S. Department of Health & Human Services. https://www.foodsafety.gov/food-safety-charts/cold-food-storage-charts
- Japan National Tourism Organization. (n.d.). The art of yoshoku: Six popular Western dishes reinvented in Japan. https://www.japan.travel/en/au/experience/cuisine/the-art-of-yoshoku-six-popular-western-dishes-reinvented-in-japan/
- Kikkoman Corporation. (n.d.). Panko / Japanese breadcrumbs. https://www.kikkoman.com/en/cookbook/glossary/panko.html
- Ministry of Agriculture, Forestry and Fisheries. (n.d.). Yokosuka kaigun curry (Yokosuka navy curry) | Our regional cuisines. Government of Japan. https://www.maff.go.jp/e/policies/market/k_ryouri/search_menu/1089/index.html
- Plenus Kome Academy. (n.d.). The roots of yoshoku: A meeting of East and West. https://www.plenus.co.jp/kome-academy/en/roots/
- Plenus Kome Academy. (n.d.). The spread of Western cuisine to the people. https://www.plenus.co.jp/kome-academy/en/roots/spread.html
- U.S. Food and Drug Administration. (2023, January 18). Are you storing food safely? https://www.fda.gov/consumers/consumer-updates/are-you-storing-food-safely
- U.S. Department of Agriculture, Food Safety and Inspection Service. (2020, July 31). Leftovers and food safety. https://www.fsis.usda.gov/food-safety/safe-food-handling-and-preparation/food-safety-basics/leftovers-and-food-safety
- Just One Cookbook. (2024, July 7). Katsu curry カツカレー. https://www.justonecookbook.com/katsu-curry/